
Introduction:
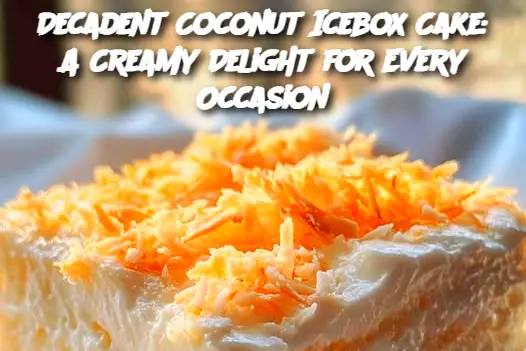
Coconut lovers, rejoice! This Coconut Icebox Cake is a creamy, refreshing, and indulgent dessert that’s perfect for warm weather gatherings or anytime you’re craving something sweet and tropical. With layers of coconut-flavored whipped cream, crunchy cookies, and a delightful coconut topping, this no-bake cake comes together effortlessly. It’s chilled in the fridge to set, making it a great make-ahead dessert that requires minimal effort but delivers maximum flavor. Whether you’re serving it at a party or enjoying it at home, this Coconut Icebox Cake is sure to impress!
Ingredients:
2 cups Heavy Whipping Cream
1 can (14 oz) Sweetened Condensed Milk
1 cup Coconut Milk (canned, full-fat)
1 teaspoon Vanilla Extract
2 cups Shredded Sweetened Coconut (divided)
1 package Graham Crackers (about 10-12 crackers, or enough to line your pan)
1/4 cup Powdered Sugar (optional, for extra sweetness)
1/2 teaspoon Coconut Extract (optional, for more coconut flavor)
Chopped Fresh Fruit (optional, for garnish)
Instructions:
Prepare the Cream Mixture: In a large mixing bowl, combine the heavy whipping cream, sweetened condensed milk, coconut milk, vanilla extract, powdered sugar (if using), and coconut extract (optional). Use an electric mixer to beat the ingredients together until the mixture forms soft peaks.
Toast the Coconut: While your cream mixture is whipping, toast 1/2 cup of the shredded coconut in a skillet over medium heat, stirring occasionally, until golden brown. Set aside to cool.
Assemble the Cake: In a 9×13-inch baking dish or similar-sized pan, begin layering the ingredients. Start by spreading a thin layer of the whipped coconut cream mixture at the bottom of the pan. Next, place a layer of graham crackers on top of the cream, slightly overlapping to cover the entire surface.
Add More Layers: Continue layering the whipped cream mixture and graham crackers, alternating between the two until you run out of ingredients. Make sure the final layer is a thick layer of the whipped coconut cream mixture.
Top with Coconut: Sprinkle the toasted coconut and the remaining shredded coconut over the top of the cake for added texture and flavor.
Chill the Cake: Cover the cake with plastic wrap or a lid and refrigerate for at least 4 hours or overnight. This allows the cake to set and the flavors to meld together.
Serve: Once chilled, slice and serve. You can also garnish the cake with fresh fruit such as sliced strawberries, pineapple chunks, or a drizzle of chocolate syrup for an extra touch of elegance.
Tips for Serving and Storing:
Chill Time: For best results, allow the cake to chill for at least 4 hours or preferably overnight. This helps the layers to set and makes for a firmer, easier-to-slice dessert.
Storage: Store any leftovers in an airtight container in the refrigerator for up to 3 days. The cake stays fresh and creamy, though the texture may soften slightly as it sits.
Serve Chilled: This cake is best served cold, making it perfect for hot weather or as a refreshing after-dinner treat.
Make Ahead: The beauty of an icebox cake is that it can be made in advance, saving you time on the day of your event. Just assemble it the day before and let the fridge do the work.
Variants:
Chocolate Coconut Icebox Cake: For a twist, try adding layers of chocolate cookies or crushed chocolate graham crackers. You can also fold cocoa powder into the whipped cream mixture for a chocolatey richness that complements the coconut flavor.
Lemon Coconut Icebox Cake: Add a bit of tartness to balance the sweetness by mixing in lemon zest or lemon juice to the whipped cream mixture. The citrusy kick pairs wonderfully with coconut.
Berry Coconut Icebox Cake: Add fresh berries like strawberries, blueberries, or raspberries between the layers for a fruity contrast. The natural sweetness and juiciness of the berries provide a burst of flavor.
Vegan Coconut Icebox Cake: Swap out the dairy ingredients for coconut-based alternatives. Use coconut cream, dairy-free whipped topping, and a plant-based sweetened condensed milk to make a vegan-friendly version.
FAQ:
ADVERTISEMENT
