
After cutting off the damaged roots, it is important to cleanse the remaining healthy roots to remove bacteria and fungi.
Rinse the roots gently with clean water to wash away debris.
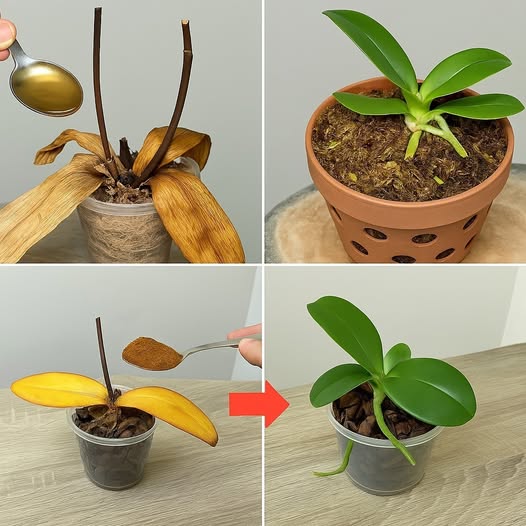
Prepare a disinfecting solution by mixing 1 teaspoon of baking soda with 2 liters of water in a jar.
Soak the orchid’s roots in this solution for 10 minutes.
Baking soda has natural antibacterial properties that help eliminate harmful pathogens and prevent further rot. After soaking, remove the orchid and allow it to air dry for a few minutes before replanting.
Step 3: Repotting the Orchid with Dry Moss
For successful recovery, orchids need a well-aerated and moisture-retentive medium. Sterilized, dry moss is an excellent choice as it absorbs excess moisture while still providing adequate hydration for root development.
Take a handful of dry, sterilized moss and place it in a new, clean pot.
Position the orchid so that the remaining healthy roots are in contact with the moss.
Gently press the moss around the base of the orchid to secure it.
Avoid over-packing the moss, as orchids require airflow around their roots.
Step 4: Creating a Recovery Environment
To encourage new root growth and prevent further stress:
Place the potted orchid in a cool, shaded area with good air circulation.
Avoid direct sunlight, which can cause dehydration.
Do not water the orchid for the first week after repotting to allow the cut roots to heal and prevent further rot.
Step 5: Resuming Watering
After a week, you can begin watering your orchid again:
Soak the entire pot in clean water for 10 minutes once a week.
Next
ADVERTISEMENT
