
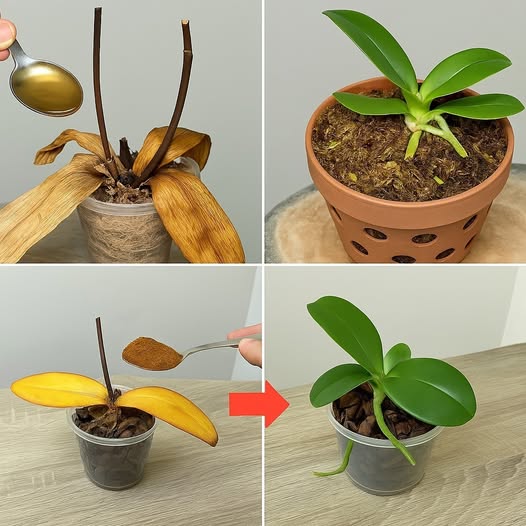
How to Revive a Rotting Orchid: A Step-by-Step Guide
Orchids are delicate and beautiful plants that require careful maintenance to thrive. However, improper care, including overuse of inorganic fertilizers, can sometimes lead to root rot, causing leaves to turn yellow and the plant to weaken. If your orchid is suffering from rot, don’t rush to throw it away! With the right steps, you can revive your orchid and help it grow strong and healthy again. This guide will walk you through a simple yet highly effective method to restore your orchid to health.
Identifying the Problem
If your orchid’s leaves have turned yellow and the plant appears weak, the first thing to check is its roots. Root rot is often the result of excessive moisture, poor drainage, or fertilizer shock from an overuse of inorganic fertilizers. Rotting roots will appear dark, mushy, and may have an unpleasant odor. Healthy roots, on the other hand, should be firm and white or green.
Step 1: Removing Damaged Roots
To prevent further damage and encourage new root growth, it is essential to remove all damaged roots:
Carefully remove the orchid from its pot.
Inspect the roots thoroughly.
Use sterilized scissors or pruning shears to cut off all rotting and damaged roots.
Be sure to make clean cuts to minimize the risk of further infection.
This process prevents the rot from spreading and stimulates the orchid to produce new, healthy roots.
Step 2: Cleaning and Disinfecting the Roots
Next
ADVERTISEMENT
